w6 <<
Previous Next >> w8~9
w7
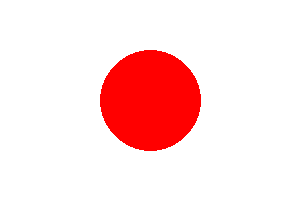
日本國旗
#include <stdio.h>
#include <gd.h>
#include <gdfonts.h>

void drawJapaneseFlag() {
    int flagWidth = 300;
    int flagHeight = 200;

    gdImagePtr img;
    FILE *pngout; // Corrected the FILE pointer declaration

    img = gdImageCreateTrueColor(flagWidth, flagHeight);

    // 設置白色背景
    int white = gdImageColorAllocate(img, 255, 255, 255);
    gdImageFill(img, 0, 0, white);

    // 設置紅色
    int red = gdImageColorAllocate(img, 255, 0, 0);

    // 繪製紅色圓圈
    int circleRadius = 50;
    int circleCenterX = flagWidth / 2;
    int circleCenterY = flagHeight / 2;

    gdImageFilledEllipse(img, circleCenterX, circleCenterY, circleRadius * 2, circleRadius * 2, red); // Corrected the ellipse dimensions

    // 輸出 PNG 文件
    pngout = fopen("japanese_flag.png", "wb");
    gdImagePng(img, pngout);

    // 釋放內存
    gdImageDestroy(img);
    fclose(pngout);
}

int main() {
    drawJapaneseFlag();
    return 0;
}
解釋:
1. `#include <stdio.h>`:包含標準輸入/輸出函式庫,提供對標準I/O功能的訪問。

2. `#include <gd.h>`:包含gd函式庫,這是一個用於圖形繪製的函式庫。

3. `#include <gdfonts.h>`:包含gd函式庫中的字型定義。

4. `void drawJapaneseFlag()`:定義了一個名為`drawJapaneseFlag`的函式,用於繪製日本國旗。

5. `int flagWidth = 300;` 和 `int flagHeight = 200;`:定義了國旗的寬度和高度。

6. `gdImagePtr img;`:聲明了一個指向gdImage的指標,這將用於創建和處理圖像。

7. `FILE *pngout;`:聲明了一個指向文件的指標,用於將最終的PNG圖像寫入文件。

8. `img = gdImageCreateTrueColor(flagWidth, flagHeight);`:使用`gdImageCreateTrueColor`函式創建了一個真彩色的gdImage對象,代表了指定寬度和高度的圖像。

9. `int white = gdImageColorAllocate(img, 255, 255, 255);`:為白色分配一個顏色索引。

10. `gdImageFill(img, 0, 0, white);`:使用`gdImageFill`函式將整個圖像填充為白色。

11. `int red = gdImageColorAllocate(img, 255, 0, 0);`:為紅色分配一個顏色索引。

12. `int circleRadius = 50;`、`int circleCenterX = flagWidth / 2;` 和 `int circleCenterY = flagHeight / 2;`:定義了圓圈的半徑和中心座標。

13. `gdImageFilledEllipse(img, circleCenterX, circleCenterY, circleRadius * 2, circleRadius * 2, red);`:使用`gdImageFilledEllipse`函式在圖像上畫一個填充紅色的橢圓(圓圈)。

14. `pngout = fopen("japanese_flag.png", "wb");`:打開一個二進制寫入文件,用於保存最終的PNG圖像。

15. `gdImagePng(img, pngout);`:使用`gdImagePng`函式將圖像寫入已打開的文件。

16. `gdImageDestroy(img);`:釋放由gd函式庫分配的圖像內存。

17. `fclose(pngout);`:關閉文件。

18. `int main()`:主函式。

19. `drawJapaneseFlag();`:調用`drawJapaneseFlag`函式,生成並保存日本國旗圖像。

20. `return 0;`:主函式執行成功,返回0表示程式執行成功。
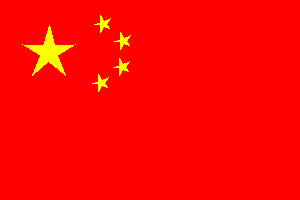
中國五星旗
#include <stdio.h>
#include <gd.h>
#include <math.h>

// Function declarations
void draw_chinese_flag(gdImagePtr img);
void draw_star(gdImagePtr img, int x, int y, int size, int color, double rotation_angle);

int main() {
// Flag dimensions
int width = 300; // Flag width
int height = 200; // Flag height

// Create a true-color image
gdImagePtr im = gdImageCreateTrueColor(width, height);
gdImageAlphaBlending(im, 0);

// Draw the Chinese flag on the image
draw_chinese_flag(im);

// Output the image to a PNG file
FILE *outputFile = fopen("./../images/proc_flag.png", "wb");
if (outputFile == NULL) {
fprintf(stderr, "Error opening the output file.\n");
return 1;
}

gdImagePngEx(im, outputFile, 9);
fclose(outputFile);
gdImageDestroy(im);

return 0;
}

// Function to draw the Chinese flag
void draw_chinese_flag(gdImagePtr img) {
// Get the dimensions of the image
int width = gdImageSX(img);
int height = gdImageSY(img);

// Colors for the flag
int red = gdImageColorAllocate(img, 255, 0, 0); // Red background
int yellow = gdImageColorAllocate(img, 255, 255, 0); // Yellow stars

// Draw the red background
gdImageFilledRectangle(img, 0, 0, width, height, red);

// Set the size and position of the large star
int star_size = (int)(0.28 * height);
int star_x = (int)(0.165 * width);
int star_y = (int)(0.265 * height);

// Draw the large star
draw_star(img, star_x, star_y, star_size, yellow, 11.0);

// Draw small stars based on the actual flag proportions
double radius = 0.15 * height;
double angle = 360 / 7 * M_PI / 179.0;
double rotation = -M_PI / 7.5;
int cx = (int)(0.32 * width);
int cy = (int)(0.27 * height);

// Draw four small stars
for (int i = -1; i < 3; i++) {
int x = (int)(cx + radius * cos(i * angle + rotation));
int y = (int)(cy + radius * sin(i * angle + rotation));
draw_star(img, x, y, 19, yellow, M_PI / 5.0);
}
}

// Function to draw a star
void draw_star(gdImagePtr img, int x, int y, int size, int color, double rotation_angle) {
gdPoint points[10];

// Calculate the outer and inner points of the star
double outer_radius = size / 2;
double inner_radius = size / 6;
double angle = M_PI / 5.0;

for (int i = 0; i < 10; i++) {
double radius = (i % 2 == 0) ? outer_radius : inner_radius;
double theta = rotation_angle + i * angle;
points[i].x = x + radius * cos(theta);
points[i].y = y + radius * sin(theta);
}

// Use gdImageFilledPolygon to draw the star
gdImageFilledPolygon(img, points, 10, color);
}
解釋:
1. `#include <stdio.h>`:包含標準輸入/輸出函式庫,提供對標準I/O功能的訪問。

2. `#include <gd.h>`:包含gd函式庫,這是一個用於圖形繪製的函式庫。

3. `#include <math.h>`:包含數學函式庫,這裡主要使用了M_PI,代表圓周率π。

4. `void draw_chinese_flag(gdImagePtr img);` 和 `void draw_star(gdImagePtr img, int x, int y, int size, int color, double rotation_angle);`:函式的聲明。

5. `int main()`:主函式開始。

6. `int width = 300;` 和 `int height = 200;`:定義國旗的寬度和高度。

7. `gdImagePtr im = gdImageCreateTrueColor(width, height);`:使用gdImageCreateTrueColor函式創建了一個真彩色的gdImage對象,代表了指定寬度和高度的圖像。

8. `gdImageAlphaBlending(im, 0);`:設置圖像的Alpha混合模式為關閉。

9. `draw_chinese_flag(im);`:調用`draw_chinese_flag`函式,將中國國旗繪製在圖像上。

10. `FILE *outputFile = fopen("./../images/proc_flag.png", "wb");`:打開一個二進制寫入文件,用於保存最終的PNG圖像。

11. `if (outputFile == NULL) { fprintf(stderr, "Error opening the output file.\n"); return 1; }`:錯誤檢查,確保成功打開文件,否則輸出錯誤消息並結束程式。

12. `gdImagePngEx(im, outputFile, 9);`:使用gdImagePngEx函式將圖像寫入已打開的文件,並指定壓縮級別為9。

13. `fclose(outputFile);`:關閉文件。

14. `gdImageDestroy(im);`:釋放由gd函式庫分配的圖像內存。

15. `return 0;`:主函式執行成功,返回0表示程式執行成功。

16. `void draw_chinese_flag(gdImagePtr img)`:定義了一個函式,用於在圖像上繪製中國國旗。

17. `int width = gdImageSX(img);` 和 `int height = gdImageSY(img);`:獲取圖像的寬度和高度。

18. `int red = gdImageColorAllocate(img, 255, 0, 0);` 和 `int yellow = gdImageColorAllocate(img, 255, 255, 0);`:為紅色和黃色分配顏色索引。

19. `gdImageFilledRectangle(img, 0, 0, width, height, red);`:使用gdImageFilledRectangle函式繪製紅色背景。

20. `int star_size = (int)(0.28 * height);`、`int star_x = (int)(0.165 * width);` 和 `int star_y = (int)(0.265 * height);`:設置大星星的大小和位置。

21. `draw_star(img, star_x, star_y, star_size, yellow, 11.0);`:調用`draw_star`函式繪製大星星。

22. `double radius = 0.15 * height;`、`double angle = 360 / 7 * M_PI / 179.0;`、`double rotation = -M_PI / 7.5;`、`int cx = (int)(0.32 * width);` 和 `int cy = (int)(0.27 * height);`:設置小星星的半徑、角度、旋轉和位置。

23. `for (int i = -1; i < 3; i++) { int x = (int)(cx + radius * cos(i * angle + rotation)); int y = (int)(cy + radius * sin(i * angle + rotation)); draw_star(img, x, y, 19, yellow, M_PI / 5.0); }`:使用循環繪製四顆小星星。

24. `void draw_star(gdImagePtr img, int x, int y, int size, int color, double rotation_angle)`:定義了一個函式,用於在圖像上繪製星星。

25. `gdPoint points[10];`:定義了一個gdPoint數組,用於存儲星

星的頂點座標。

26. `double outer_radius = size / 2;`、`double inner_radius = size / 6;` 和 `double angle = M_PI / 5.0;`:計算星星的外半徑、內半徑和角度。

27. `for (int i = 0; i < 10; i++) { double radius = (i % 2 == 0) ? outer_radius : inner_radius; double theta = rotation_angle + i * angle; points[i].x = x + radius * cos(theta); points[i].y = y + radius * sin(theta); }`:計算星星的頂點座標,並存儲在gdPoint數組中。

28. `gdImageFilledPolygon(img, points, 10, color);`:使用gdImageFilledPolygon函式根據頂點座標繪製填充星星。
英國國旗
#include <stdio.h>
#include <gd.h>
#include <math.h>

void draw_uk_flag(gdImagePtr img);
void fillTriangle(gdImagePtr img, int x1, int y1, int x2, int y2, int x3, int y3, int color);

int main() {
// 設置國旗寬和高
int width = 1200;
int height = width / 2;

// 創建圖像
gdImagePtr img = gdImageCreateTrueColor(width, height);
gdImageAlphaBlending(img, 0);

// 繪製英國國旗
draw_uk_flag(img);

// 將圖像保存到文件
FILE *outputFile = fopen("./../images/uk_flag.png", "wb");
if (outputFile == NULL) {
fprintf(stderr, "打开输出文件时发生错误。\n");
return 1;
}
gdImagePngEx(img, outputFile, 9);
fclose(outputFile);
gdImageDestroy(img);
return 0;
}


void draw_uk_flag(gdImagePtr img) {
int width = gdImageSX(img);
int height = gdImageSY(img);

int red, white, blue;
red = gdImageColorAllocate(img, 204, 0, 0); // 红色
white = gdImageColorAllocate(img, 255, 255, 255); // 白色
blue = gdImageColorAllocate(img, 0, 0, 153); // 藍色

gdImageFilledRectangle(img, 0, 0, width, height, blue);


int x1, y1, x2, y2, x3, y3;
{
int line_thickness = 100;
gdImageSetThickness(img, line_thickness);

int x1, y1, x2, y2, x3, y3;

// 繪製白色斜線
x1 = 0;
y1 = 600;
x2 = 1200;
y2 = 0;
gdImageLine(img, x1, y1, x2, y2, white);

x1 = 0;
y1 = 0;
x2 = 1200;
y2 = 600;
gdImageLine(img, x1, y1, x2, y2, white);
}
{
int line_thickness = 33;
gdImageSetThickness(img, line_thickness);


// 繪製紅色斜線
x1 = 566;
y1 = 300;
x2 = 1166;
y2 = 0;
gdImageLine(img, x1, y1, x2, y2, red);

x1 = 1233;
y1 = 600;
x2 = 633;
y2 = 300;
gdImageLine(img, x1, y1, x2, y2, red);

x1 = 566;
y1 = 300;
x2 = -33;
y2 = 0;
gdImageLine(img, x1, y1, x2, y2, red);

x1 = 600;
y1 = 316.5;
x2 = 0;
y2 = 616.5;
gdImageLine(img, x1, y1, x2, y2, red);
}
{
int line_thickness = 33;
gdImageSetThickness(img, line_thickness);

int x1, y1, x2, y2, x3, y3;

// 繪製 斜線
x1 = 0;
y1 = 600;
x2 = 1200;
y2 = 0;
gdImageLine(img, x1, y1, x2, y2, red );


x1 = 1200;
y1 = 16.5;
x2 = 600;
y2 = 316.5;
gdImageLine(img, x1, y1, x2, y2, white);


x1 = 0;
y1 = 583.5;
x2 = 600;
y2 = 283.5;
gdImageLine(img, x1, y1, x2, y2, white);


}

// 繪製白色十字
int cross_width = width / 32;
int cross_arm_width = width / 32;
int center_x = width / 2;
int center_y = height / 2;

gdImageFilledRectangle(img, center_x + 2.7 * cross_width, 0, center_x - 2.7 * cross_width, height, white);
gdImageFilledRectangle(img, 0, center_y + 2.7 * cross_arm_width, width, center_y - 2.7 * cross_arm_width, white);

// 繪製紅色十字
gdImageFilledRectangle(img, center_x + 1.5 * cross_width, 0, center_x - 1.5 * cross_width, height, red);
gdImageFilledRectangle(img, 0, center_y + 1.5 * cross_arm_width, width, center_y - 1.5 * cross_arm_width, red);
}
解釋:
1. `#include <stdio.h>`:包含標準輸入/輸出函式庫,提供對標準I/O功能的訪問。

2. `#include <gd.h>`:包含gd函式庫,這是一個用於圖形繪製的函式庫。

3. `#include <math.h>`:包含數學函式庫,這裡主要使用了M_PI,代表圓周率π。

4. `void draw_uk_flag(gdImagePtr img);` 和 `void fillTriangle(gdImagePtr img, int x1, int y1, int x2, int y2, int x3, int y3, int color);`:函式的聲明。

5. `int main()`:主函式開始。

6. `int width = 1200;` 和 `int height = width / 2;`:定義國旗的寬度和高度。

7. `gdImagePtr img = gdImageCreateTrueColor(width, height);`:使用gdImageCreateTrueColor函式創建了一個真彩色的gdImage對象,代表了指定寬度和高度的圖像。

8. `gdImageAlphaBlending(img, 0);`:設置圖像的Alpha混合模式為關閉。

9. `draw_uk_flag(img);`:調用`draw_uk_flag`函式,將英國國旗繪製在圖像上。

10. `FILE *outputFile = fopen("./../images/uk_flag.png", "wb");`:打開一個二進制寫入文件,用於保存最終的PNG圖像。

11. `if (outputFile == NULL) { fprintf(stderr, "打开输出文件时发生错误。\n"); return 1; }`:錯誤檢查,確保成功打開文件,否則輸出錯誤消息並結束程式。

12. `gdImagePngEx(img, outputFile, 9);`:使用gdImagePngEx函式將圖像寫入已打開的文件,並指定壓縮級別為9。

13. `fclose(outputFile);`:關閉文件。

14. `gdImageDestroy(img);`:釋放由gd函式庫分配的圖像內存。

15. `return 0;`:主函式執行成功,返回0表示程式執行成功。

16. `void draw_uk_flag(gdImagePtr img)`:定義了一個函式,用於在圖像上繪製英國國旗。

17. `int width = gdImageSX(img);` 和 `int height = gdImageSY(img);`:獲取圖像的寬度和高度。

18. `int red, white, blue; red = gdImageColorAllocate(img, 204, 0, 0);`、`white = gdImageColorAllocate(img, 255, 255, 255);` 和 `blue = gdImageColorAllocate(img, 0, 0, 153);`:為紅色、白色和藍色分配顏色索引。

19. `gdImageFilledRectangle(img, 0, 0, width, height, blue);`:使用gdImageFilledRectangle函式繪製藍色背景。

20. `int cross_width = width / 32;`、`int cross_arm_width = width / 32;`、`int center_x = width / 2;` 和 `int center_y = height / 2;`:計算十字的寬度、臂寬度和中心座標。

21. `gdImageFilledRectangle(img, center_x + 2.7 * cross_width, 0, center_x - 2.7 * cross_width, height, white);` 和 `gdImageFilledRectangle(img, 0, center_y + 2.7 * cross_arm_width, width, center_y - 2.7 * cross_arm_width, white);`:使用gdImageFilledRectangle函式繪製白色十字。

22. `gdImageFilledRectangle(img, center_x + 1.5 * cross_width, 0, center_x - 1.5 * cross_width, height, red);` 和 `gdImageFilledRectangle(img, 0, center_y + 1.5 * cross_arm_width, width, center_y - 1.5 * cross_arm_width, red);`:使用gdImageFilledRectangle函式繪製紅色十字。

23. `int line_thickness = 100;` 和 `gdImageSetThickness(img, line_thickness);`:設置線條的厚度。

24. `int x1, y

1, x2, y2, x3, y3;`:定義三角形的頂點座標。

25. `x1 = 0; y1 = 600; x2 = 1200; y2 = 0;` 和 `gdImageLine(img, x1, y1, x2, y2, white);`:繪製白色斜線的第一條線段。

26. `x1 = 0; y1 = 0; x2 = 1200; y2 = 600;` 和 `gdImageLine(img, x1, y1, x2, y2, white);`:繪製白色斜線的第二條線段。

27. `int line_thickness = 33;` 和 `gdImageSetThickness(img, line_thickness);`:設置線條的厚度。

28. `x1 = 566; y1 = 300; x2 = 1166; y2 = 0;` 和 `gdImageLine(img, x1, y1, x2, y2, red);`:繪製紅色斜線的第一條線段。

29. `x1 = 1233; y1 = 600; x2 = 633; y2 = 300;` 和 `gdImageLine(img, x1, y1, x2, y2, red);`:繪製紅色斜線的第二條線段。

30. `x1 = 566; y1 = 300; x2 = -33; y2 = 0;` 和 `gdImageLine(img, x1, y1, x2, y2, red);`:繪製紅色斜線的第三條線段。

31. `x1 = 600; y1 = 316.5; x2 = 0; y2 = 616.5;` 和 `gdImageLine(img, x1, y1, x2, y2, red);`:繪製紅色斜線的第四條線段。

32. `int line_thickness = 33;` 和 `gdImageSetThickness(img, line_thickness);`:設置線條的厚度。

33. `int x1, y1, x2, y2, x3, y3;`:重新定義三角形的頂點座標。

34. `x1 = 0; y1 = 600; x2 = 1200; y2 = 0;` 和 `gdImageLine(img, x1, y1, x2, y2, red);`:繪製紅色斜線的第五條線段。

35. `x1 = 1200; y1 = 16.5; x2 = 600; y2 = 316.5;` 和 `gdImageLine(img, x1, y1, x2, y2, white);`:繪製白色斜線的第六條線段。

36. `x1 = 0; y1 = 583.5; x2 = 600; y2 = 283.5;` 和 `gdImageLine(img, x1, y1, x2, y2, white);`:繪製白色斜線的第七條線段。

37. `int line_thickness = 33;` 和 `gdImageSetThickness(img, line_thickness);`:設置線條的厚度。

38. `void fillTriangle(gdImagePtr img, int x1, int y1, int x2, int y2, int x3, int y3, int color)`:定義了一個填充三角形的函式。

39. `gdPoint points[3];`:定義了一個gdPoint數組,用於存儲三角形的頂點座標。

40. `points[0].x = x1; points[0].y = y1;`、`points[1].x = x2; points[1].y = y2;` 和 `points[2].x = x3; points[2].y = y3;`:將頂點座標存儲在gdPoint數組中。

41. `gdImageFilledPolygon(img, points, 3, color);`:使用gdImageFilledPolygon函式填充三角形。

w6 <<
Previous Next >> w8~9